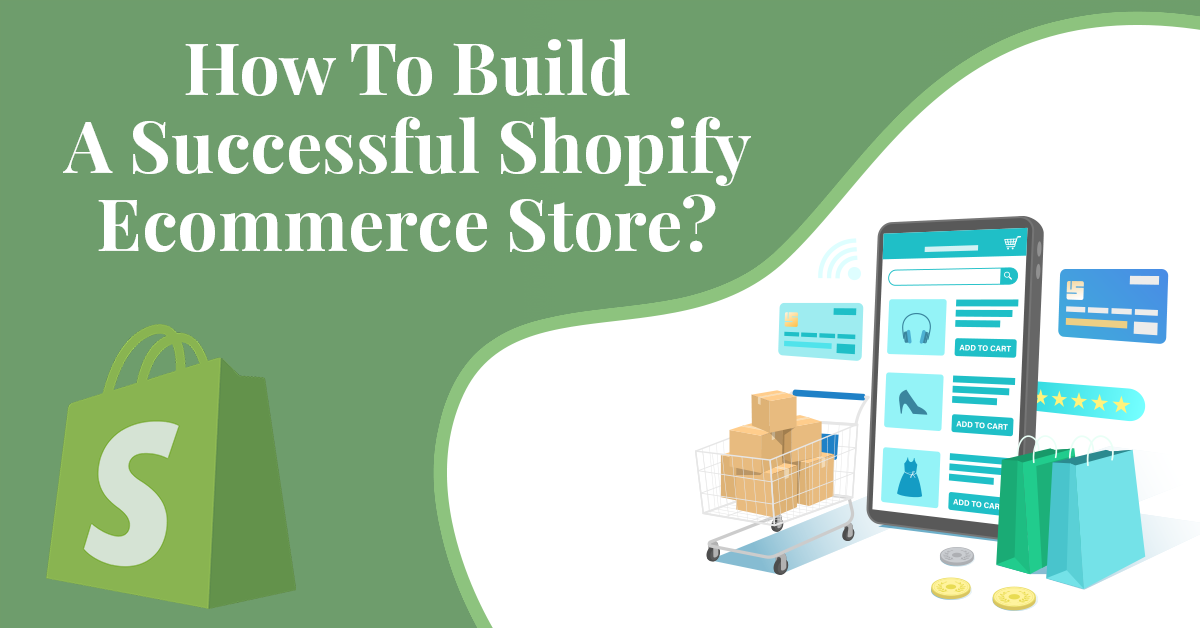
How To Build A Successful Shopify Ecommerce Store?
When you think about commencing a new online business, you may find it both exciting and overwhelming. You can sell your products in different locations and areas so that your business sees everlasting growth with positive customer reviews.
But once you start creating an eCommerce store, you might find it a bit frustrating as there are so many aspects in it that you may have never heard of before. In this case, you need a website where you don’t require any additional designing skills and you just have to input your product details and other information to make your store.
If you are a new entrepreneur and looking for a similar platform, then Shopify is the right choice for your eCommerce website.
Shopify eCommerce store is one of the popular online business platforms that offer a wide range of functions and features that will let you kickstart your online journey easily.
What Is Shopify Ecommerce Store?
Shopify eCommerce platform is an easy-to-use and user-friendly site that lets online store owners sell products on different channels from one single dashboard. With Shopify website creation, small and large businesses can create an appealing and profitable store.
Millions of people all around the globe use this platform to set up their online stores. You can create, launch and run a successful Shopify eCommerce store with just a minimal subscription fee. It offers pre-designed templates that can be easily customized by a Shopify website development company.
This also saves your website from hacking by offering secure and reliable hosting and payment gateways. From handcrafted jewelry to online classes, you can sell anything on the Shopify platform.
With its in-built reports and analytics features, you can study and analyze the behavior of your customers and also obtain detailed information about your sales and profits. Some of the key elements of Shopify include
- Third-party app integrations
- Creating a website in multiple languages
- Unlimited templates under different categories
- Blogs
- SEO
- Getting help from professional Shopify experts
- Secured and reliable payment gateways
- Forums
- 24/7 customer support
Steps To Create a Successful Shopify Ecommerce Store
Earlier when you wanted to set up an eCommerce store, it required a lot of technical know-how, however, everything has changed in this digital era and you can easily set up a Shopify store by clicking just a few buttons and entering your product’s information.
In this blog, you will learn the complete method on how to create a Shopify website in just 30 minutes where you will showcase your products and services to your audiences and grow your customer base.
1. Sign up to create a Shopify account
The first step you need to perform is to create a Shopify account on Shopify.com by clicking on start free trial.
After this, you will be asked certain questions such as if you are already selling products or you have just started doing it and places where you want to sell the products which you can choose accordingly.
2. Decide the name of your store
Once your account is set, it will ask you to name your store. For Shopify store creation, you can use the Shopify business name generator tool to keep a unique name for your store.
You can also search for keywords such as ‘store’ or ‘shop’ in this tool as it will give you more recommendations.
3. Provide additional details about your business
After filling in all the initial options, a dashboard will open on your screen. Click on your profile name on the right upper side and then select manage account. Here, you will need to fulfill all the general details about your business.
4. Add pages

Before adding products to your Shopify website, you need to add key pages by clicking on the online store. Some of the important pages for your store include: About Us, Privacy and Policy, Blogs, FAQ, and Contact Page.
Note: Home Page is not included in this Shopify website creation add pages step as it’s better to first pick a theme and then customize your home page.
Fill in all the details in the add pages such as title, page content, SEO information, etc.
5. Add products to your store

The next step in the Shopify store setup is to upload products to your Shopify store. For this, from the home page of the Shopify website, select “add product” to upload your product and services.
- Product Title
It is the first thing users will notice when they will see your products either in your store or on the Google search engine. Thus, your title should always be short, clear, and engaging.
You should also research using tools like Moz Keyword Planner to add keywords to your title to rank high on SERP.
- Product Description
Here, you don’t have to write long information on why to buy a particular product but you need to write this by knowing your objective, buyer’s persona, and unique selling points (USPs) of the items.
You should also use simple and easy language, bold headings, short paragraphs, and bullet points.
- Product Media
Shopify store creation allows you to display your products through photos, videos, and 3D models. But you need to ensure a few points:
- To make your Shopify page look perfect, you need to use the same aspect ratio for all your product images
- You need to use high-quality images and 4K resolution videos by hiring a professional photographer to shoot the images and videos of your items
- Your video length should not exceed 1GB or 10 minutes size. Consider using an online video compressor to reduce file size without significantly compromising video quality.
- Add a proper alt text to your images and also take close-up photos from different angles
- While uploading photos, choose a resolution of 800X800 pixels with a minimum width of 2048 pixel
- Product Pricing
You should always set the price of your product by maintaining a balance between its value and additional costs such as raw materials, shipping costs, employees’ salaries, rent, etc.
It is a tricky task but you can always play a try-and-error game here by testing and deciding the price according to your competitors and then later modifying it as per the results you are getting.
Once you have decided on the price, it’s time to add it to your Shopify store in the ‘price column’ of the product page. It is optional to input another value in the column ‘compare at price’ as this helps customers know the actual price of an item so that they can compare it with the current price of the product which appears at a discounted rate.
For example – Suppose $5 in the ‘price’ field and $7 in the ‘compare at price’ column. Here, people will see $5 as the current price of the product and a cut sign on $7. This way more shoppers will be attracted to your product just by the price.
The ‘cost per item’ column is also optional as it just helps you to add the cost price of the product so that you can later calculate the actual profit earned on each of them.
The ‘charge tax on this product’ box depends on the location and type of product you are selling.
- Inventory
Here, you list the number of items in your store and it will help you to show what products are still available or if you are running out of stock. It lets you add stock-keeping units (SKUs), barcodes, quantity information, and the location of the inventory.
You can tick the track quantity box and continue selling when out of stock. If it doesn’t take you long to fulfill your stock, then you can tick the continue selling when you are out of stock or if it takes you more time to gather the stock, then you can just leave it unticked.
- Shipping
You can input weight and custom information when you are selling physical products. This field will help you to calculate the shipping charges of a particular product.
- Product Options
To set up a Shopify store effectively, you need to fill in product options for your items such as color, size, or variants such as price, quantity, SKU, and barcode.
One thing to remember here is that you can create only 3 product options for each item such as color, size, and material, and almost 100 variants of these.
But if you are short of product options and variants, then you can go for the Shopify app store or know how to select the best Shopify development company to add various options and grow your store.
- Search Engine Listing
To create a Shopify website that ranks high on the search engine, you need to add these 3 important fields i.e. product title which is up to 70 characters, meta description up to 320 characters, and a URL so that Google indexes your page accurately.
You can also hire an SEO service provider company to fulfill all your website needs.
Note – Keep the title and description short and engaging and try to incorporate keywords in it.
- Product Status
Once you are satisfied with the information that you have input, you will see a product status on the right side of the screen. Here, you have to click on the active option or it might be there by default.
You can also check if the boxes are ticked under the sales channels and apps where you want to sell your goods.
- Product Organization
This column lets you add more information about your items so that you can easily set up discounts and collections. This includes
- Product Category
It is the major category of your products
- Product Type
A particular type of the product
- Vendor
The name of the seller or manufacturer of the products
- Collections
We will discuss this in the next point in more detail but for now, it means a catalog of your products that you featured either in your navigation menu or on the home page.
- Tags
Add a few keywords that are related to your products. It will guide users to locate products easily in your Shopify store.
6. Create collections of your products
It is a group of products that has similar features that shoppers might be looking for while visiting your site.
To keep Your Shopify store organized, you should always group your products into different categories as it gives an extraordinary shopping experience to users and helps you in customer retention.
For example – If you are selling women’s accessories, then your collections will include purses, earrings, necklaces, bracelets, etc. Your buyers may also be looking for products on sale, goods of different sizes and colors, clothes only for kids, and seasonal products such as decoration items.
To create a collection of products in the Shopify store setup, go to products > Collections > Create a collection. Here, you have to insert images, SEO details, title, description and so on which is just similar to adding the product details.
Ideally, collections are displayed in the navigation menu or home page so that customers won’t have to search your entire store or catalog while looking for a specific product.
You can also create discounts on a particular collection of products so that shoppers can easily navigate and click on those links.
One thing that must be taken care of is the selection of the ‘collection type’ box.
Here, in the ‘manual’ option, you would be able to search for your products and add them to your collection one by one.
But in the ‘automated’ option, your items will automatically add to your collections as per the conditions that you have set earlier in each product. This saves a lot of time and effort when you are dealing with a large volume of inventory.
7. Select a theme for your Shopify store

For this, you will get numerous themes for your Shopify website on the Shopify theme store from where you can select free or paid themes as per your choice according to your industry type.
Once you have selected a theme, click on customize option and a theme editor will open on your screen from where you will see different menu options on the left-hand side.
From here, you can customize your website using different features such as a header, footer, banner image, announcement bar, buttons, text beneath the banner image, headings, featured collection of products, collage, video, and many more options.
You can change the color scheme, select different fonts, add detailed information about the items listed on your pages and insert links from your social media accounts.
You can also use theme settings where you will see advanced editing options such as media, icons, currency format, blog cards, layout, colors, and typography. You can also check out which theme can be used to make your store look and feel good.
One important thing to be kept in mind in Shopify website creation is to pay attention to the details and features that you are using on your website to make sure that they are a proper fit for your store.
On the left side, you will see editing options and on the right side, you will see how your store looks after using various editing options. You can select different font styles and colors to edit the layout of each page of your store.
Paid themes or premium themes will ensure every small detail of your website as it comes with extra modification options which you can choose to be performed by a Shopify store setup company. They will make adjustments by using CSS and HTML codings of the selected theme.
If you are stuck somewhere in the process or want your website to be created by a professional, then you will always have the option to select the best Shopify website development company or experts for your Shopify store setup as they will provide you interactive designs.
According to a report, it has been found that almost 58.99% of global website traffic comes from mobile devices. Therefore, mobile optimization is crucial to rank in search engines and Shopify store creation allows you to create your site in a mobile-friendly manner.
If you want to ensure the best customer experience then you need to come up with unique Shopify store design ideas. You can improve the overall aesthetics of the store once you select the best theme and modify it from the Shopify experts who will create a mobile-optimized store.
You can customize each key page that you created for your site as per your needs by selecting the most suitable theme from the store.
Notes:
- While creating an about us page, make it look real and personal by telling the story behind your brand
- You can design a visually appealing banner image using banner editing tools or through canva templates. You just have to select the dimension 1200×360 px, upload an image of your product add 1 or 2 lines, and put a ‘Buy Now’ button
- While creating your home page, it is advisable to always showcase your best products and keep upgrading them from time to time so that it becomes easy for your potential buyers to select one from your popular products
8. Create navigation menus

People generally search in the main menu to find products and information about your store. Your main menu will be displayed on each page of your site and your list of items will be displayed on the header and footer sections.
For this, click on the online store and then on the navigation, and after this, you can edit the ‘main menu’ and ‘footer menu’.
You can add several collections under one menu item by clicking on the link ‘add menu item’ and you will get the option to add pages and their links and then finally click the ‘save menu’. You should never add too many items but instead, you can create a drop-down list of items under each existing menu.
If you are finding any difficulty, then you don’t have to worry as you can easily assign your Shopify project to a reputed Shopify website development company so that all your tasks are performed smoothly and on time.
You just have to choose Shopify for your store creation as there are tons of Shopify eCommerce store development companies that can grow your business.
9. Set up your Shopify payment gateway

In Shopify website creation, it is very important to set up a payment gateway and choose the most appropriate payment methods for your customers.
You can either choose Shopify payments or other third-party payment gateways such as PhonePe, Google Pay, credit cards, etc and then you just have to provide your personal information, business details, bank account number, and product information.
For this, click on settings and then on payments. Here, you can add different third-party payment providers such as PayPal or manual payment method options.
Before you choose a payment gateway, we recommend you conduct a survey by adding a few payment modes to your store as from here you can identify what payment options are generally preferred by your audience.
You should know every detail about different modes of payment such as UPI, credit card, debit card, etc., and the amount charged on each transaction.
Finally, choose the right payment gateway option to create a Shopify website that runs successfully in the future.
10 . Set up your shipping charges

To operate this, click on settings and then choose shipping and delivery in your dashboard. There are 3 types of shipping rates:
- Free shipping rates
Customers here are not required to pay any additional charges
- Flat shipping rates
Charges are not connected to the weight or price
- Calculated shipping rates
Rates are determined based on the weight or price of the item
Shipping charges are determined based on packaging costs, location of shopper, product size, product type, etc.
We recommend you choose Shopify shipping if you ship your orders from the USA, Canada, Australia, France, UK, Spain, and Italy as you can avail discounts as high as 88% on UPS, USPS, and DHL shipping rates depending upon your plan.
11. Set up your tax charges

Shopify website creation requires you to obtain a sales tax from its clients as there are certain tax requirements on the specific products in your region.
The best part of using Shopify is that it automatically calculates taxes on ongoing sales around the globe.
To run this, click on settings and then on taxes and duties.
From here you can manage your sales tax collection for your country or region and the rest of the world, compare various plans and decide how you will charge the taxes i.e. include a tax on price, include or exclude tax based on your client’s location, charge taxes on shipping rates, or charge VAT on digital goods.
Tax rules are varied in different countries but it would be beneficial to consult with a tax professional or with Shopify experts to avoid any miscalculation.
You can also carefully look at Shopify’s official documentation on tax rates to carefully design your Shopify store.
12. Set up your checkout page

To wrap up your Shopify store, customize your checkout page by clicking on settings and then clicking on the checkout.
From here, you can administer your customer accounts, customer contact methods, customer information, tipping, order processing, consent for marketing, order status page, and checkout language.
13. Connect diverse Shopify apps

You can always make your Shopify store advanced by adding apps from the Shopify marketplace.
Go to your admin panel and then click on apps and you can find one for email marketing, social media marketing, upselling and cross-selling, and many more. You can also choose review apps so that your customers can talk about your business which will surely build trust in them.
14. Connect Facebook and Instagram

From sales channels, select Facebook and Instagram, click on store set up, and then on connect account.
You can further continue connecting these apps and grow your clients by tracking them from your Shopify app or you can even choose a Shopify website development company to perform this function.
15. Register your domain name
It’s highly important to have a unique domain name in the Shopify store setup process. On your home page, select add a custom domain and then add a domain from here or you can connect your existing domain or purchase a new one from the Shopify store for around $9 to $15.
You can also buy it from other third-party vendors such as GoDaddy.com where the domain price starts at $10 per year or you can also consider hiring Shopify experts for the same.
16. Remove password protection

When you create a Shopify website, it is important to remove the password-protected mode as it is already set in-store by default.
With this mode, only you will have access to your store but if you disable it, then your customers can also check out your store. Click on the online store and then preference and from here, remove password protection.
17. Test your Shopify store system
Once you have completely set up your store, it’s time to use it like a real shopper by placing an order just like a user will do until the checkout process.
You can also immediately cancel your order to avoid paying any transaction fee and this way you will know if your Shopify store is working error free or not in all areas.
18. Test functions and launch your store
It’s better to also check if all the aspects of your store are running smoothly or not. For this, you can visit the Shopify store launch checklist where you can identify and perform pre-launch checks on your site.
Once your store is ready, you can select a Shopify plan for your store that suits you best so that it goes live and you can start selling products.
But after all your tasks have been performed, how will you turn this into a successful Shopify store?
19. Develop your website further
Once your Shopify store is live, you can commence your eCommerce journey. Now from here, you want to make sure that your store is attracting new customers every day and earning huge profits.
Your answer to the previous question is that you can turn a new store into a successful online business by handing it to an expert and trusted Shopify development agency.
They will make sure that your website is SEO-friendly, has multiple apps integrated, has a separate blogs section, is connected to various other sales channels such as Facebook, Instagram, and Amazon, and run Google Ads continuously on your store to generate more sales.
Conclusion
Congratulations! You have now successfully created your Shopify store.
Preparing an online store on your own for the first time can be both an exciting and challenging process and requires an appropriate skill set.
Once you have found out how to set up a Shopify store, it is also important for you to be on top of the competition to provide an ultimate shopping experience, increase sales and improve customer service.
All these tasks can be performed by a Shopify eCommerce store development company as they will carefully create and modify your store in different areas when required.
Apart from store creation, you should also focus on building your brand image via content creation, running ads, and building clients on social media platforms.
Before designing your store, you should also have effective marketing plans and strategies which define how you will work in the future.
You need to find new ways to boost your sales and grow your eCommerce store business by taking help from online videos and blogs or hiring a professional and experienced Shopify agency.