AWS Machine Learning Blog
Use custom metadata created by Amazon Comprehend to intelligently process insurance claims using Amazon Kendra
Structured data, defined as data following a fixed pattern such as information stored in columns within databases, and unstructured data, which lacks a specific form or pattern like text, images, or social media posts, both continue to grow as they are produced and consumed by various organizations. For instance, according to International Data Corporation (IDC), the world’s data volume is expected to increase tenfold by 2025, with unstructured data accounting for a significant portion. Enterprises may want to add custom metadata like document types (W-2 forms or paystubs), various entity types such as names, organization, and address, in addition to the standard metadata like file type, date created, or size to extend the intelligent search while ingesting the documents. The custom metadata helps organizations and enterprises categorize information in their preferred way. For example, metadata can be used for filtering and searching. Customers can create the custom metadata using Amazon Comprehend, a natural-language processing (NLP) service managed by AWS to extract insights about the content of documents, and ingest it into Amazon Kendra along with their data into the index. Amazon Kendra is a highly accurate and easy-to-use enterprise search service powered by Machine Learning (AWS). The custom metadata can then be used to enrich the content for better filtering and facet capabilities. In Amazon Kendra, facets are scoped views of a set of search results. For example, you can provide search results for cities across the world, where documents are filtered by a specific city with which they are associated. You could also create facets to display results by a specific author.
Insurance companies are burdened with increasing numbers of claims that they must process. Additionally, the complexity of claims processing is also increasing due to the diverse types of insurance documents involved, and custom entities in each of these documents. In this post, we describe a use case for custom content enrichment for insurance providers. The insurance provider receives payout claims from the beneficiary’s attorney for different insurance types, such as home, auto, and life insurance. In this use case, the documents received by the insurance provider do not contain any metadata that allows searching the content based on certain entities and classes. The insurance provider wants to filter Kendra content based on custom entities and classes specific to their business domain. This post illustrates how you can automate and simplify metadata generation using custom models by Amazon Comprehend. The metadata generated can be customized during the ingestion process with Amazon Kendra Custom Document Enrichment (CDE) custom logic.
Let’s look at a few examples of Amazon Kendra search with or without filtering and facets capabilities.
In the following screenshot, Amazon Kendra provides a search result but there is no option to further narrow down the search results by using any filters.

The following screenshot shows Amazon Kendra search results can be filtered by using different facets like Law Firm, Policy Numbers, created by custom metadata to narrow down the search results.

The solution discussed in this post can easily be applied to other businesses/use-cases as well, such as healthcare, manufacturing, and research.
Solution overview
In this proposed solution, we will 1) classify insurance claims submissions into various classes, and 2) retrieve insurance-specific entities from these documents. When this is complete, the document can be routed to the appropriate department or downstream process.
The following diagram outlines the proposed solution architecture.

Amazon Comprehend custom classification API is used to organize your documents into categories (classes) that you define. Custom classification is a two-step process. First, you train a custom classification model (also called a classifier) to recognize the classes that are of interest to you. Then, you use your model to classify any number of document sets.
Amazon Comprehend custom entity recognition feature is used to identify specific entity types (names of insurance company, names of the insurer, policy number) beyond what is available in the generic entity types by default. Building a custom entity recognition model is a more effective approach than using string matching or regular expressions to extract entities from documents. A custom entity recognition model can learn the context where those names are likely to appear. Additionally, string matching will not detect entities that have typos or follow new naming conventions, while this is possible using a custom model.
Before diving deeper, let’s take a moment to explore Amazon Kendra. Amazon Kendra is a highly accurate and easy-to-use enterprise search service powered by machine learning. It allows users to find the information they need within the vast amount of content spread across their organization, ranging from websites and databases to intranet sites. We will first create an Amazon Kendra index to ingest the documents. While ingesting the data, it’s essential to consider the concept of Custom Data Enrichment (CDE). CDE enables you to enhance the search capability by incorporating external knowledge into the search index. For more information, refer to Enriching your documents during ingestion. In this post, the CDE logic invokes the custom APIs of Amazon Comprehend to enrich the documents with identified classes and entities. Finally, we use the Amazon Kendra search page to show how the metadata enhanced the search capability by adding faceting and filtering capabilities.
The high-level steps to implement this solution are as follows:
- Train the Amazon Comprehend custom classifier using training data
- Train the Amazon Comprehend custom entity recognition using training data
- Create the Amazon Comprehend custom classifier and custom entity recognition endpoints
- Create and deploy a Lambda function for post extraction enrichment
- Create and populate the Amazon Kendra index
- Use the extracted entities to filter searches in Amazon Kendra
We have also provided a sample application in the GitHub repo for reference.
Data security and IAM considerations
With security as the top priority, this solution follows the least privilege permissions principle for the services and features used. The IAM role used by Amazon Comprehend custom classification and custom entity recognition has permissions to access the dataset from the test bucket only. The Amazon Kendra service has access to a specific S3 bucket and Lambda function used to call comprehend APIs. The Lambda function has permissions to call the Amazon Comprehend APIs only. For more information, review section 1.2 and 1.3 in the notebook.
We recommend you do the following in a non-production environment prior to implementing the solution in the production environment.
Train the Comprehend custom classifier using training data
Amazon Comprehend Custom Classification supports two data format types for annotation files:
- Using the CSV option
- Using the Augment manifest file option with the help of using SageMaker Ground Truth to Label Data
Since our data is already labeled and stored in CSV files, we will use the CSV file format for the annotation file as an example. We have to provide the labeled training data as UTF-8 encoded text in a CSV file. Do not include a header row in the CSV file. Adding a header row in your file may cause runtime errors. An example to the training data CSV file is as follows:
To prepare classifier training data, refer to Preparing classifier training data. For each row in the CSV file, the first column contains one or more class labels. A class label can be any valid UTF-8 string. We recommend using clear class names that don’t overlap in meaning. The name can include white space, and can consist of multiple words connected by underscores or hyphens. Do not leave any space characters before or after the commas that separate the values in a row.
Next, you will train either using Multi-class mode or Multi-label mode. Specifically, in multi-class mode, classification assigns one class for each document, while in multi-label mode, individual classes represent different categories that aren’t mutually exclusive. In our case we will be using the Multi-Class mode for Plain-text models.
You can prepare separate training and testing datasets for Amazon Comprehend custom classifier training and model evaluation. Or, only provide one dataset for both training and testing. Comprehend will automatically select 10% of your provided dataset to use as testing data. In this example, we are providing separate training and testing datasets.
The following example shows a CSV file containing the class names associated with the various documents.
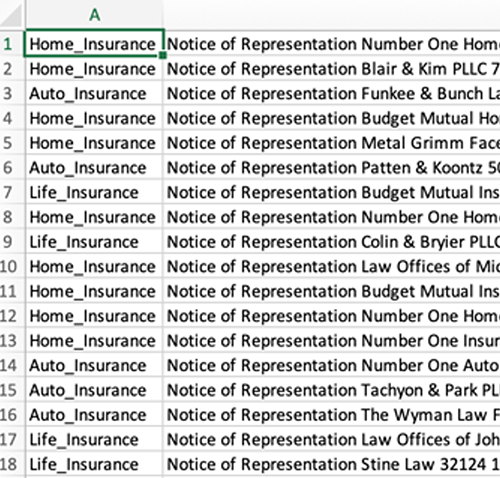
Document format – Type of Insurance, Content of document 1
When the custom classification model is trained, it can capture different classes of insurance on the documents (Home, Auto, or Life insurance).
Train the Amazon Comprehend custom entity recognizer (NER) using training data
The training dataset for Amazon Comprehend Custom Entity Recognition (NER) can be prepared in one of two different ways:
- Annotations – Provides a data set that contains the annotated entities for mode training
- Entity lists (plain text only) – Provides a list of entities and their label type (such as “Insurance company names”) and a set of unannotated documents containing those entities for model training
For more information, refer to Preparing entity recognizer training data.
When training a model using entity list, we need to provide two pieces of information: a list of entity names with their associated custom entity types and a collection of unannotated documents in which the entities appear.
Automatic training requires having two types of information: sample documents and the entity list or annotations. Once the recognizer is trained, you can use it to detect custom entities in your documents. You can quickly analyze a small body of text in real time, or you can analyze a large set of documents with an asynchronous job.
You can prepare separate training and testing datasets for Amazon Comprehend custom entity recognizer training and model evaluation. Or provide only one dataset for both training and testing. Amazon Comprehend will automatically select 10% of your provided dataset to use as testing data. In the below example, we specified the training dataset as Documents.S3Uri under InputDataConfig.
The following example shows a CSV file containing the of entities:

Once the custom entities (NER) model is trained, it will be able to extract the various entities like “PAYOUT“, “INSURANCE_COMPANY“, “LAW_FIRM“, “POLICY_HOLDER_NAME“, “POLICY_NUMBER“.
Create the Amazon Comprehend custom classifier and custom entities (NER) endpoints
Amazon Comprehend’s endpoints make your custom models available for real-time classification. After you create an endpoint, you can make changes to it as your business needs evolve. For example, you can monitor your endpoint utilization and apply auto scaling to automatically set endpoint provisioning to fit your capacity needs. You can manage all your endpoints from a single view, and when you no longer need an endpoint, you can delete it to save costs. Amazon Comprehend support both synchronous and asynchronous options, if real-time classification isn’t required for your use case, you can submit a batch job to Amazon Comprehend for asynchronous data classification.
For this use case, you create an endpoint to make your custom model available for real-time analysis.
To meet your text processing needs, you assign inference units to the endpoint, and each unit allows a throughput of 100 characters per second. You can then adjust the throughput up or down.
Create and deploy a Lambda function for post extraction enrichment
The post-extraction Lambda function allows you to implement the logic to process the text extracted by Amazon Kendra from the ingested document. The post-extraction function we configured implements the code to invoke Amazon Comprehend to detect custom entities and custom classifying the documents from the text extracted by Amazon Kendra, and uses them to update the document metadata, which is presented as facets in an Amazon Kendra search. The function code is embedded in the notebook. The PostExtractionLambda code works as follows:
- Splits the page text into sections that do not exceed the max byte length limit of the comprehend
detect_entitiesAPI. (See Limits ).
NOTE the script uses a naive character length splitting algorithm for simplicity – production use cases should implement overlapping or sentence boundary splits, based on UTF8 byte length. - For each section of the text, calls the comprehend real-time endpoints for custom entities and custom classifier to detect the following entity types: [“
PAYOUT“, “INSURANCE_COMPANY“, “LAW_FIRM“, “POLICY_HOLDER_NAME“, “POLICY_NUMBER“, “INSURANCE_TYPE“]. - Filters out detected entities that are below the confidence score threshold. We are using 0.50 threshold which means only entities with confidence 50% and more will be used. This can be tuned based on the use case and requirements.
- Tracks the frequency count of each entity.
- Selects only the top N (10) unique entities for each page, based on frequency of occurrence.
- For document classification, the multi-class classifier assigns only one class for each document. In this Lambda function, the documents will be classified as Auto Insurance, Home Insurance, or Life Insurance.
Note that as of this writing, CDE only supports synchronous calls or if it has to be asynchronous, then an explicit wait loop is needed. For post extraction Lambda the max execution time is 1 min. The Lambda custom logic can be changed based on the requirements that fit your use case.
Create and populate the Amazon Kendra index
In this step, we will ingest the data to the Amazon Kendra index and make it searchable for the users. During the ingestion, we will use the Lambda function created in the previous step as a post extraction step and the Lambda function will call the custom classification and custom entity recognition (NER) endpoints to create the custom metadata fields.
The high-level steps to implement this solution are as follows:
- Create Amazon Kendra Index.
- Create Amazon Kendra Data source – There are different data sources which can be used to ingest dataset. In this post we are using an S3 bucket.
- Create Facets
Law_Firm,Payout,Insurance_Company,Policy_Number,Policy_Holder_Name,Insurance_Typewith string type as ‘STRING_LIST_VALUE’. - Create Kendra CDE and point it to the post-extraction Lambda function previously created.
- Perform the sync process to ingest the dataset.
Once completed, you can populate the index with the insurance data, using the Kendra CDE with post extraction lambda, you can filter searches based on the custom entity types and custom classification as custom metadata fields.
Use the extracted entities to filter searches in Kendra
Now the index is populated and ready to use. In the Amazon Kendra console, choose Search Indexed Content under Data Management and do the following.
Query the following: List of insurance failed due to late filing?

The results show an answer from the policy type – HOME INSURANCE and brings text_18 and text_14 as the top results.
Choose “Filter search results” on the left. Now you will see all the Entity types and classification values extracted using Comprehend, and for each entity value and classification you will see the number of matching documents.

Under INSURANCE_TYPE choose “Auto-Insurance”, and then you will get an answer from text_25 file.
Note that your results may vary slightly from the results shown in the screenshot.
Try searching with your own queries, and observe how the entities and document classification identified by Amazon Comprehend quickly allows you to:
- See how your search results are distributed across the categories.
- Narrow your search by filtering on any of the entity/classification values.
Clean up
After you have experimented with the search and tried the notebook provided in the Github repository, delete the infrastructure you provisioned in your AWS account to avoid any unwanted charges. You can run the cleanup cells in the notebook. Alternatively, you can delete the resources manually through the AWS console:
- Amazon Kendra Index
- Comprehend custom classifier and custom entity recognition (NER) endpoints
- Comprehend custom classifier and custom entity recognition (NER) custom models
- Lambda function
- S3 bucket
- IAM roles and policies
Conclusion
In this post, we showed how Amazon Comprehend custom entities and custom classifier enables Amazon Kendra search powered by CDE feature to help end-users perform better searches on the structured/unstructured data. The custom entities of Amazon Comprehend and custom classifier makes it very useful for different use cases and various domain specific data. For more information about how to use Amazon Comprehend, refer to Amazon Comprehend developer resources and for Amazon Kendra, refer to Amazon Kendra developer resources.
Give this solution a try for your use case. We invite you to leave your feedback in the comments sections.
About the Authors
 Amit Chaudhary is a Senior Solutions Architect at Amazon Web Services. His focus area is AI/ML, and he helps customers with generative AI, large language models, and prompt engineering. Outside of work, Amit enjoys spending time with his family.
 Yanyan Zhang is a Senior Data Scientist in the Energy Delivery team with AWS Professional Services. She is passionate about helping customers solve real problems with AI/ML knowledge. Recently, her focus has been on exploring the potential of Generative AI and LLM. Outside of work, she loves traveling, working out and exploring new things.
 Nikhil Jha is a Senior Technical Account Manager at Amazon Web Services. His focus areas include AI/ML, and analytics. In his spare time, he enjoys playing badminton with his daughter and exploring the outdoors.