Updated on February 14, 2024
Tired of frustrated user experience?
Give your Flutter app a personality with an AI assistant powered by IBM Watson!
In this blog, we’ll walk you through the step-by-step process of adding an IBM Watson Chatbot to your Flutter app with the help of Kommunicate. Whether you’re a developer or a business owner looking to enhance customer experience, this guide will help you with the knowledge and skills needed to create a dynamic and intelligent chat experience within your Flutter application.
Prerequisites:
List the software and accounts needed:
- Flutter Development Environment
- Kommunicate account
- IBM Cloud account with Watson Assistant setup.
Steps to Integrate IBM Watson Chatbot with Kommunicate in Your Flutter App
Step 1: Setup an account in Kommunicate
Login to your Kommunicate dashboard and navigate to the Bot Integration section.
If you do not have an account, you can create one here for free.
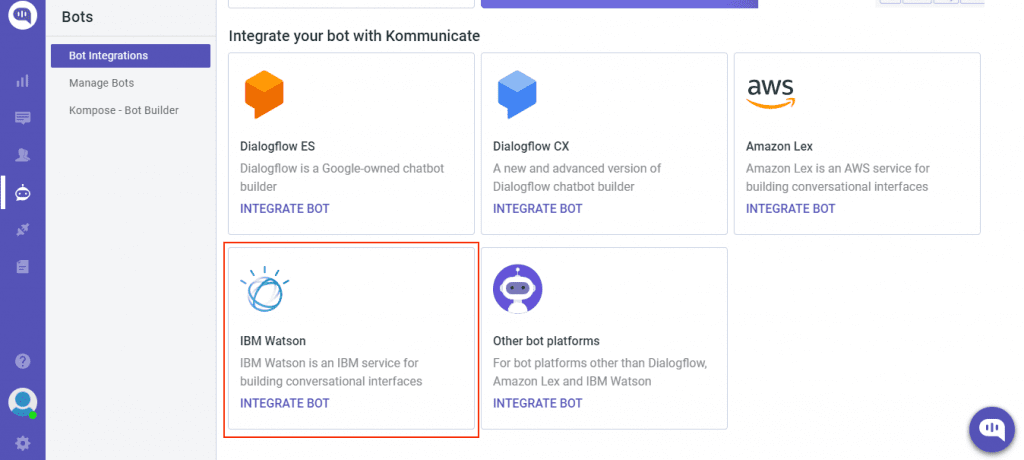
Step 2: Integrate a bot from IBM Watson
Locate the IBM Watson section and click on Integrate Bot.
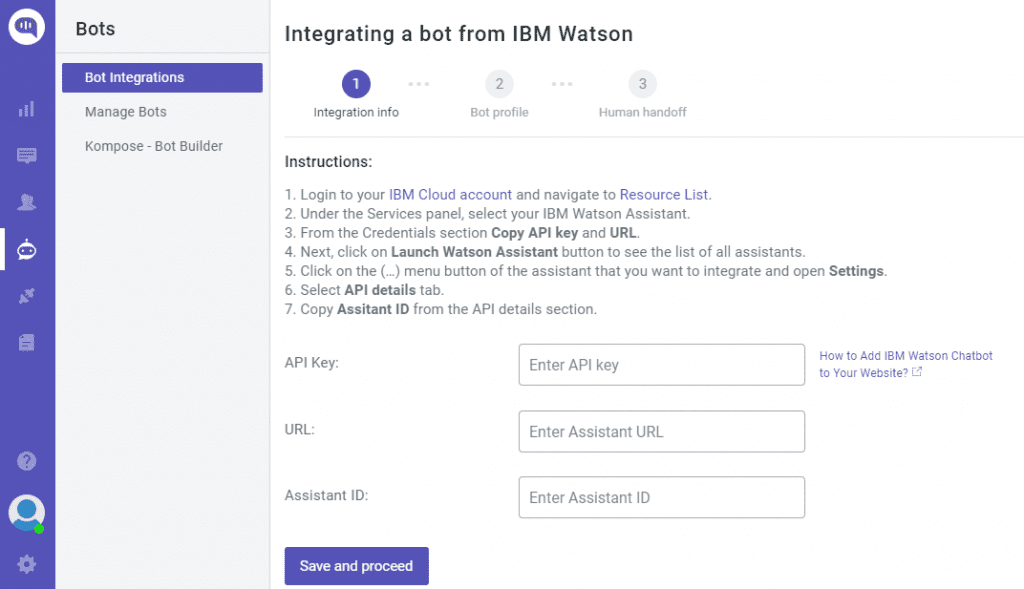
Now, navigate to your IBM cloud console and copy the API key, URL, and Watson Assistant ID. Here are the steps to locate these sections.
- Login to your IBM Cloud account and navigate to Resource List.
- Under the Services panel, select your IBM Watson Assistant.
- From the Credentials section Copy the API key and URL
- Next, click on the Launch Watson Assistant button to see the list of all assistants.
- Click on the (…) menu button of the assistant that you want to integrate and open Settings.
- Select the API details tab.
- Copy the Assitant ID from the API details section.
Suggested Read: How to Integrate Dialogflow with Your Flutter App
You can also refer to this blog for IBM Watson integration with Kommunicate.
You can check your newly created bot in the below section:
- Dashboard →Bot Integration → Manage Bots: You can check all your integrated bots here.
Step3: Add Routing Rules
Once you create a bot, you can set it as a default bot in the conversation routing rules section, as shown below.
- Click on ⚙️ Settings >> Conversation rules >> Routing rules for bots >> Then click on bot like below and select your bot
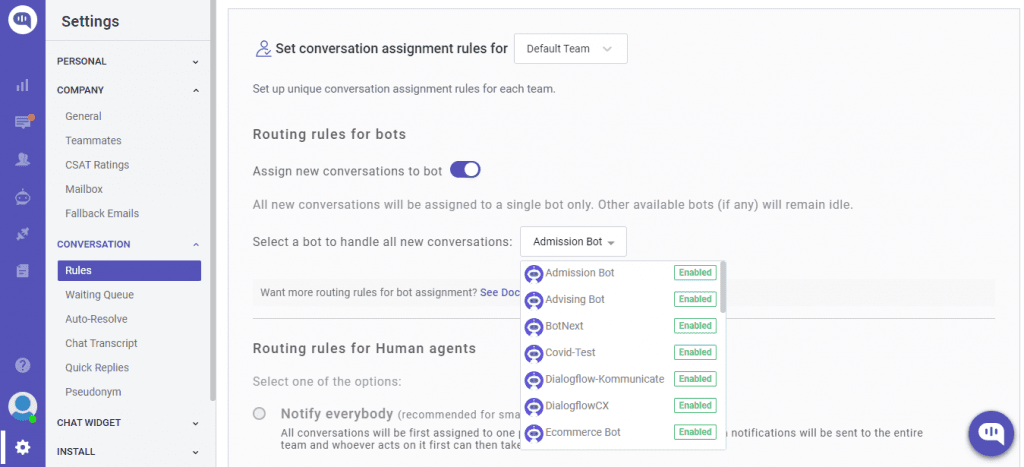
Now, this bot will reply to all the conversations.
Step 4: Install and setup the IBM Watson chatbot into Flutter App
Kommunicate Flutter SDK allows you to add customizable live chat to your applications. It supports many hybrid platforms that are currently in the market. It provides a fast and expressive way to build native apps on both IOS and Android.
Step 5: Add Kommunicate Flutter SDK to your app
1. Add the below dependency in your pubspec.yaml file:1dependencies: 2 # other dependencies 3 kommunicate_flutter: ^1.1.3
2. Install the package as flutter pub get
Step 6: Implement the Chat Widget
Import kommunicate_flutter in your .dart file to use the methods from Kommunicate:1import 'package:kommunicate_flutter/kommunicate_flutter.dart';
For iOS, navigate to your App/iOS directory from the terminal and run the below command:1pod install
Note: Kommunicate iOS requires min iOS platform version 10 and uses dynamic frameworks. Make sure you have the below settings at the top of your iOS/Podfile:
1platform :ios, '10.0' 2use_frameworks!
Step 6: Get your Application ID
You can get the Application ID from the install section of Kommunicate Dashboard.
- Go to ⚙️Settings >> INSTALL >> Install >> Your App ID:
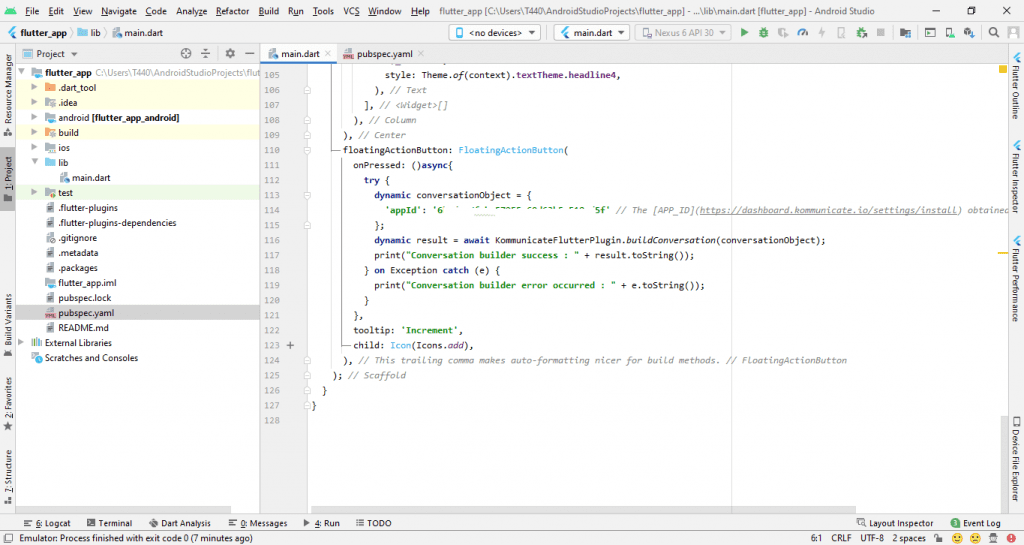
Step 7: Launch conversation
Kommunicate provides a built-in conversation function to create and launch conversations directly. It saves your extra steps of authentication, creation, initialization, and launch. You can customize the process by building the conversation object according to your requirements.
To launch the conversation you need to create a conversation object. This object is passed to the build conversation function and based on the parameters of the object the conversation is created/launched.
Below is an example of launching a conversation.
dynamic conversationObject = {
     'appId': '<APP_ID>',// The [APP_ID](https://dashboard.kommunicate.io/settings/install) obtained from kommunicate dashboard.
     };

    KommunicateFlutterPlugin.buildConversation(conversationObject)
        .then((clientConversationId) {
      print("Conversation builder success : " + clientConversationId.toString());
    }).catchError((error) {
      print("Conversation builder error : " + error.toString());
    });
That’s all! Run the Flutter app and chat with the IBM Watson chatbot.
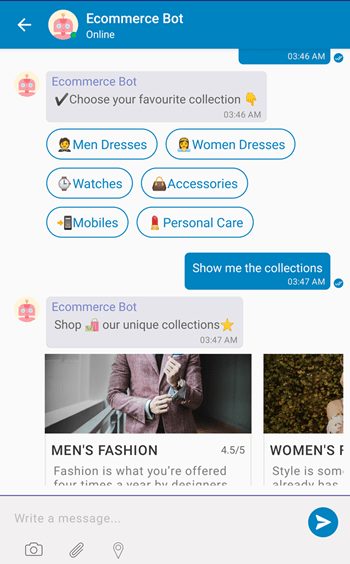
Step 8: Test and Launch
Run your Flutter app and test the chatbot integration. Send messages to the chatbot and verify if it responds correctly based on your training.
You can easily integrate the IBM Watson chatbot into Flutter apps in a few simple steps.
In case you need more information, you can check out the Kommunicate documentation.
Kommunicate Sample application: Download the sample app from here which includes ready-to-use Kommunicate Flutter SDK.
Go ahead and explore the Flutter integration with the IBM Watson chatbot.
Bonus: Build chatbot and activate in Flutter app
Conclusion: Empowering Your Flutter App with a Powerful AI Assistant
By integrating an IBM Watson Chatbot into your Flutter app with Kommunicate, you’ve taken a significant step towards building a smarter and more engaging user experience.
Ready to unleash the full potential of AI assistants in your Flutter app? Start your integration today!

As a seasoned technologist, Adarsh brings over 14+ years of experience in software development, artificial intelligence, and machine learning to his role. His expertise in building scalable and robust tech solutions has been instrumental in the company’s growth and success.